In this post I would like to explain the basic concepts and steps need to setup Siri Intent and demystify the complexity somewhat. You might have an app and you want it to get a little bit smarter or you just want to expose some of it’s functionality to Voice UI. This is where SiriKit with Siri Shortcuts comes in.
I want to preface this post with the following. I felt there is a need for a more simple and yet more concise look at how to setup a Siri for your app using Intents which is the truly powerful way to extend your app using new SiriKit features introduced in WWDC18. Having just implemented this great feature in one my own apps it dawned on me that there is a lack a good explanation on what is what in SiriKit.
Apple provides a great demo app, SoupChef but it is slightly too complex to really explain the main parts of the setup required to create your own custom Siri intents. The app and videos that come with it also mix in NSUserActivity which is a simple way to get Siri interacting with your app.
My apologies for a length post but there are some concepts that need explaining. Once you get through this, you will see that there isn’t that much that needs to be done.
Donating Shortcuts
Everyone is talking about donating shortcuts and intents. What is donating? If this sounds slightly confusing then allow me to explain. What happens is, you can assign a shortcut which itself has an action associated with it that iOS will exposure to end user through places like Spotlight Search and Siri Suggestions based on user’s activity.
This doesn’t mean every app needs to have this functionality. Apps such as lunch ordering or navigation app or a sports app might have a good reason to do it. But for example a utility app might not. You might want to only expose your Siri Shortcut via in app interface using the Add to Siri Button or your own custom interface.
This is what Apple says about donating.
“Donate a shortcut each time the user performs the action in your app. Make one, and only one, donation per action at the time the user performs the action. If the user performs the same action again, make another donation. For example, if the user can order soup from a restaurant using your app, donate a shortcut for the order soup action after the user places their order. If the user places another order, then make another order soup donation.
However, don’t make more than one shortcut donation for an action at the time the user performs the action. Additionally, don’t make donations for actions the user has not completed in your app; if the user never places an order for soup, don’t donate a shortcut for the order soup action.”
I won’t go into technical side of donating in this post as it’s not part of minimum required functionality. Donating shortcuts is optional and no all apps need to have it. Please read Apple’s documentation to learn more.
Add to Siri Button UI
What is it? This is a button provided by Apple to setup Siri voice command from within your own app.
Why use it? There are number of reasons.
Consistency of user experience comes high on my list. Apple provides INUIAddVoiceShortcutButton which is a button that allows user to add or edit shortcut. It comes in four different styles. Why is it important. as this is a new feature of the iOS the end users need to become aware of this functionality and if we as are developers give them the same UI to work with then they will be able to discover this functionality much faster across all the apps.
Some apps might have such interfaces that don’t work well with build in functionality so you might want to roll your own version but it would be helpful for everyone if it at least resembled the provided version.
Another reason to use default Add to Siri button you get free functionality out of the box with.
Let’s begin. Start a new iOS Project.
In your View Controller add this function.
This will place a button in the middle of your View. The button will allow to add, edit or delete single siri voice command associated with it.
Xcode will throw a few errors at this point. First of all add import IntentsUI inside your view controller. This will silence the one of the errors. You need IntentsUI framework as INUIAddVoiceShortcutButton comes from it.
At this point your code still won’t run as your app doesn’t know what the intent is. Let’s create it!
Creating Intent
What is an intent? Intent is an action. Specifically a Siri action a user can perform. To create an intent you first need to create an indent definition file.
In your project, add new file

Siri intent file creation screen
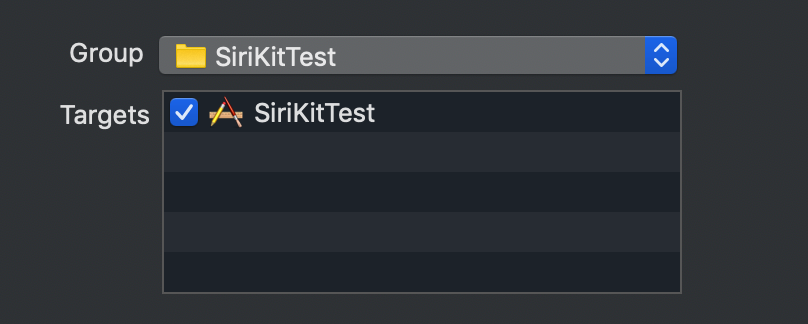
Make sure to tick Target and place your file inside your project group.
Give file a name. In my case I just left it as Intents. Naming things is the hardest thing about coding but as this is a demo project we stick with defaults.
Clicking on the file presents your with a familiar layout. Here we define our Custom Intent. Click on the + (plus) button in the bottom left corner and select New Intent.
Give it a name, I went with Test. Then give it a title, Test Siri in my case. The parameters section is an important part as this is what you will pass to Siri for processing. In our case it will be a simple string. It can be any other type such as quality of items being requested or name of the soup for example.
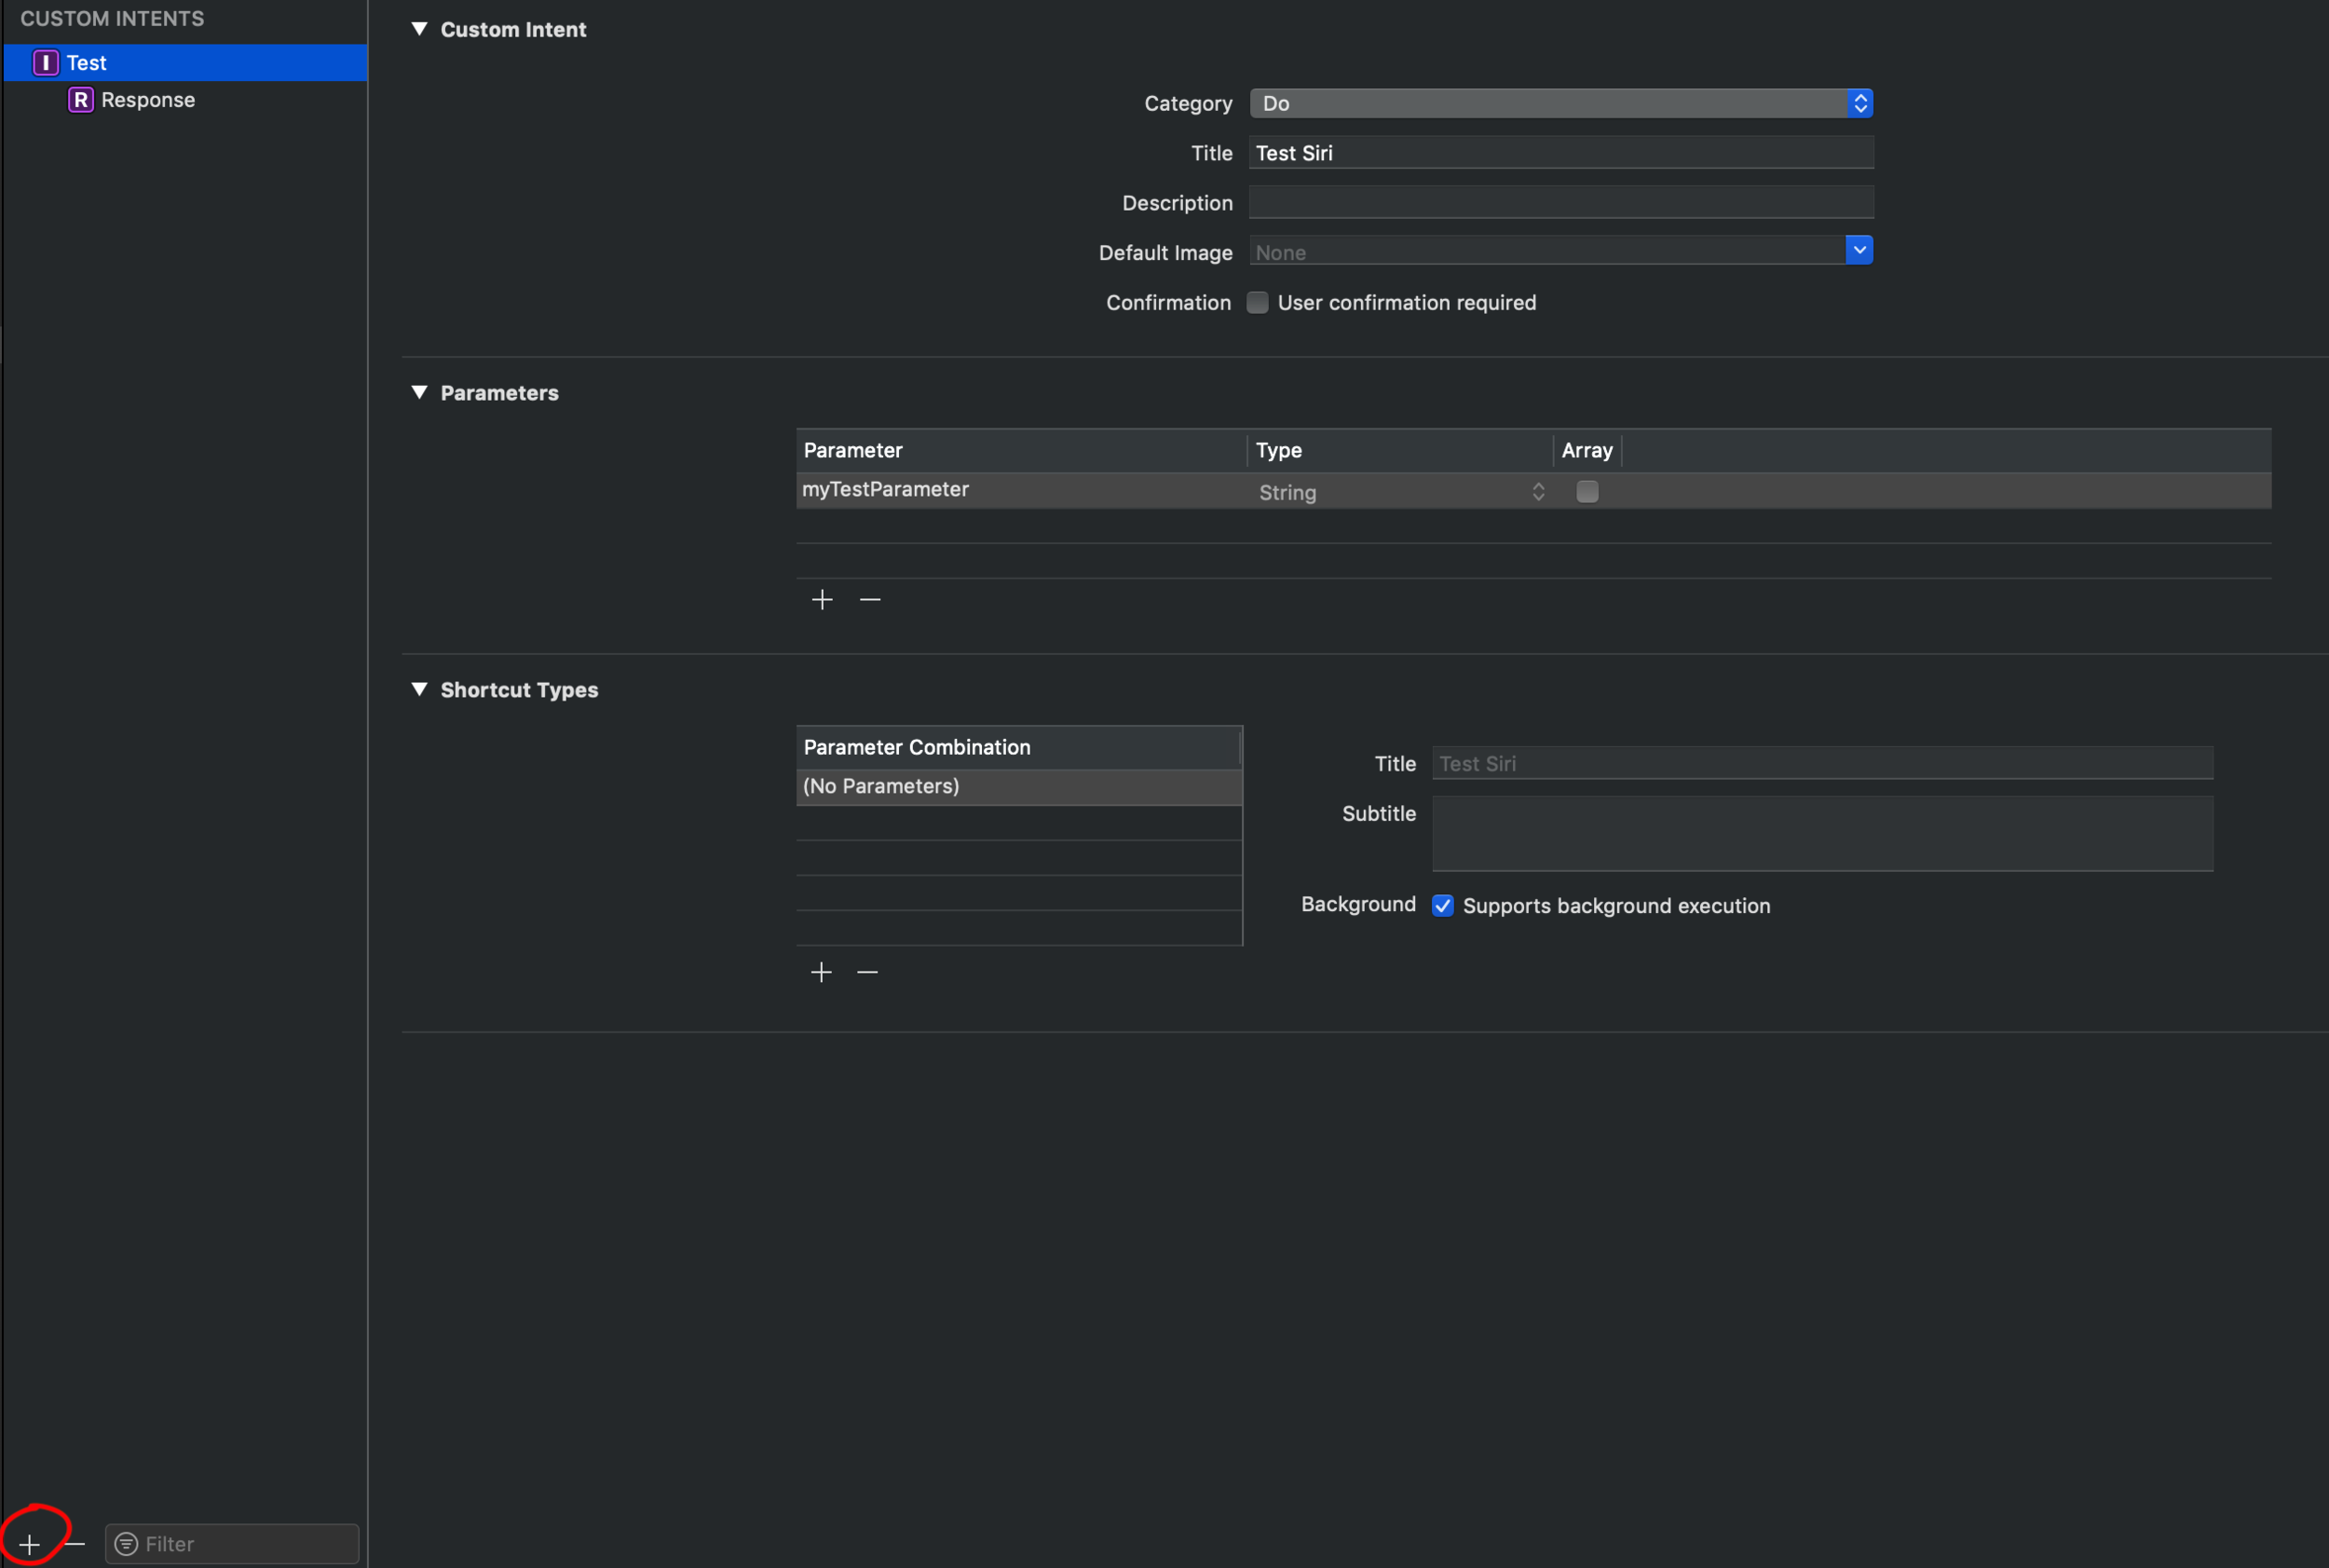
Siri Intents Definition File
The screenshot above shows you the minimal required amount of information needed to setup an intent.
Important - Once you setup the intent inside the Intent Definition File Xcode will autogenerate a code which creates a class for your custom Intent. This file is not visible inside your project file but you will be able to view the source code.
In Response I didn't put anything in at the moment. Response allows you to add parameters that you expect/want to pass back to user with Siri response. It can also include the string that Siri will say back to the user using Siri’s natural language processing. This is the cool part.
Now we have intent setup, Xcode should generate the intent class for you. Go back to View Controller where Add to Siri Button is setup and add the following extensions.
The first extension conforms viewcontroller to INUIAddVoiceShortcutButtonDelegate protocol which will silence the warning on the button.delegate = self.
It is important to add addVoiceShortcutViewController.delegate = self and editVoiceShortcutViewController.delegate = self .
The editVoiceShortcutViewController.modalPresentationStyle = .formSheet is an optimal parameter for setting the style of how view controller will invoked.
The next to extensions conform viewcontroller to INUIAddVoiceShortcutViewControllerDelegate and INUIEditVoiceShortcutViewControllerDelegate protocols which take care of summoning Add to Siri controller from the Settings->Siri & Search->My Shortcuts.
Add to Siri Controller
These functions come as with protocols and Xcode will prompt you to add the stubs for you. All you need to do is add controller.dismiss(animated: true, completion: nil).
Finally we came to the part where we create public instance of the intent for use inside the shortcut.
This part is best typed out as you might have named your intent different. If the code generation was successful you should be able to start typing the name of your intent and Xcode will give you autocomplete. If it doesn’t then Clean Build (Command + Shift + K), sometimes it take it a moment to catch up.
Once this is setup you are ready to run your project and there shouldn’t be any errors.

Add to Siri button

Added to Siri button
For this intent you can define other parameters such as invocation phase, example below.
testIntent.suggestedInvocationPhrase = NSString.deferredLocalizedIntentsString(with: "SUGGESTED_PHRASE") as String
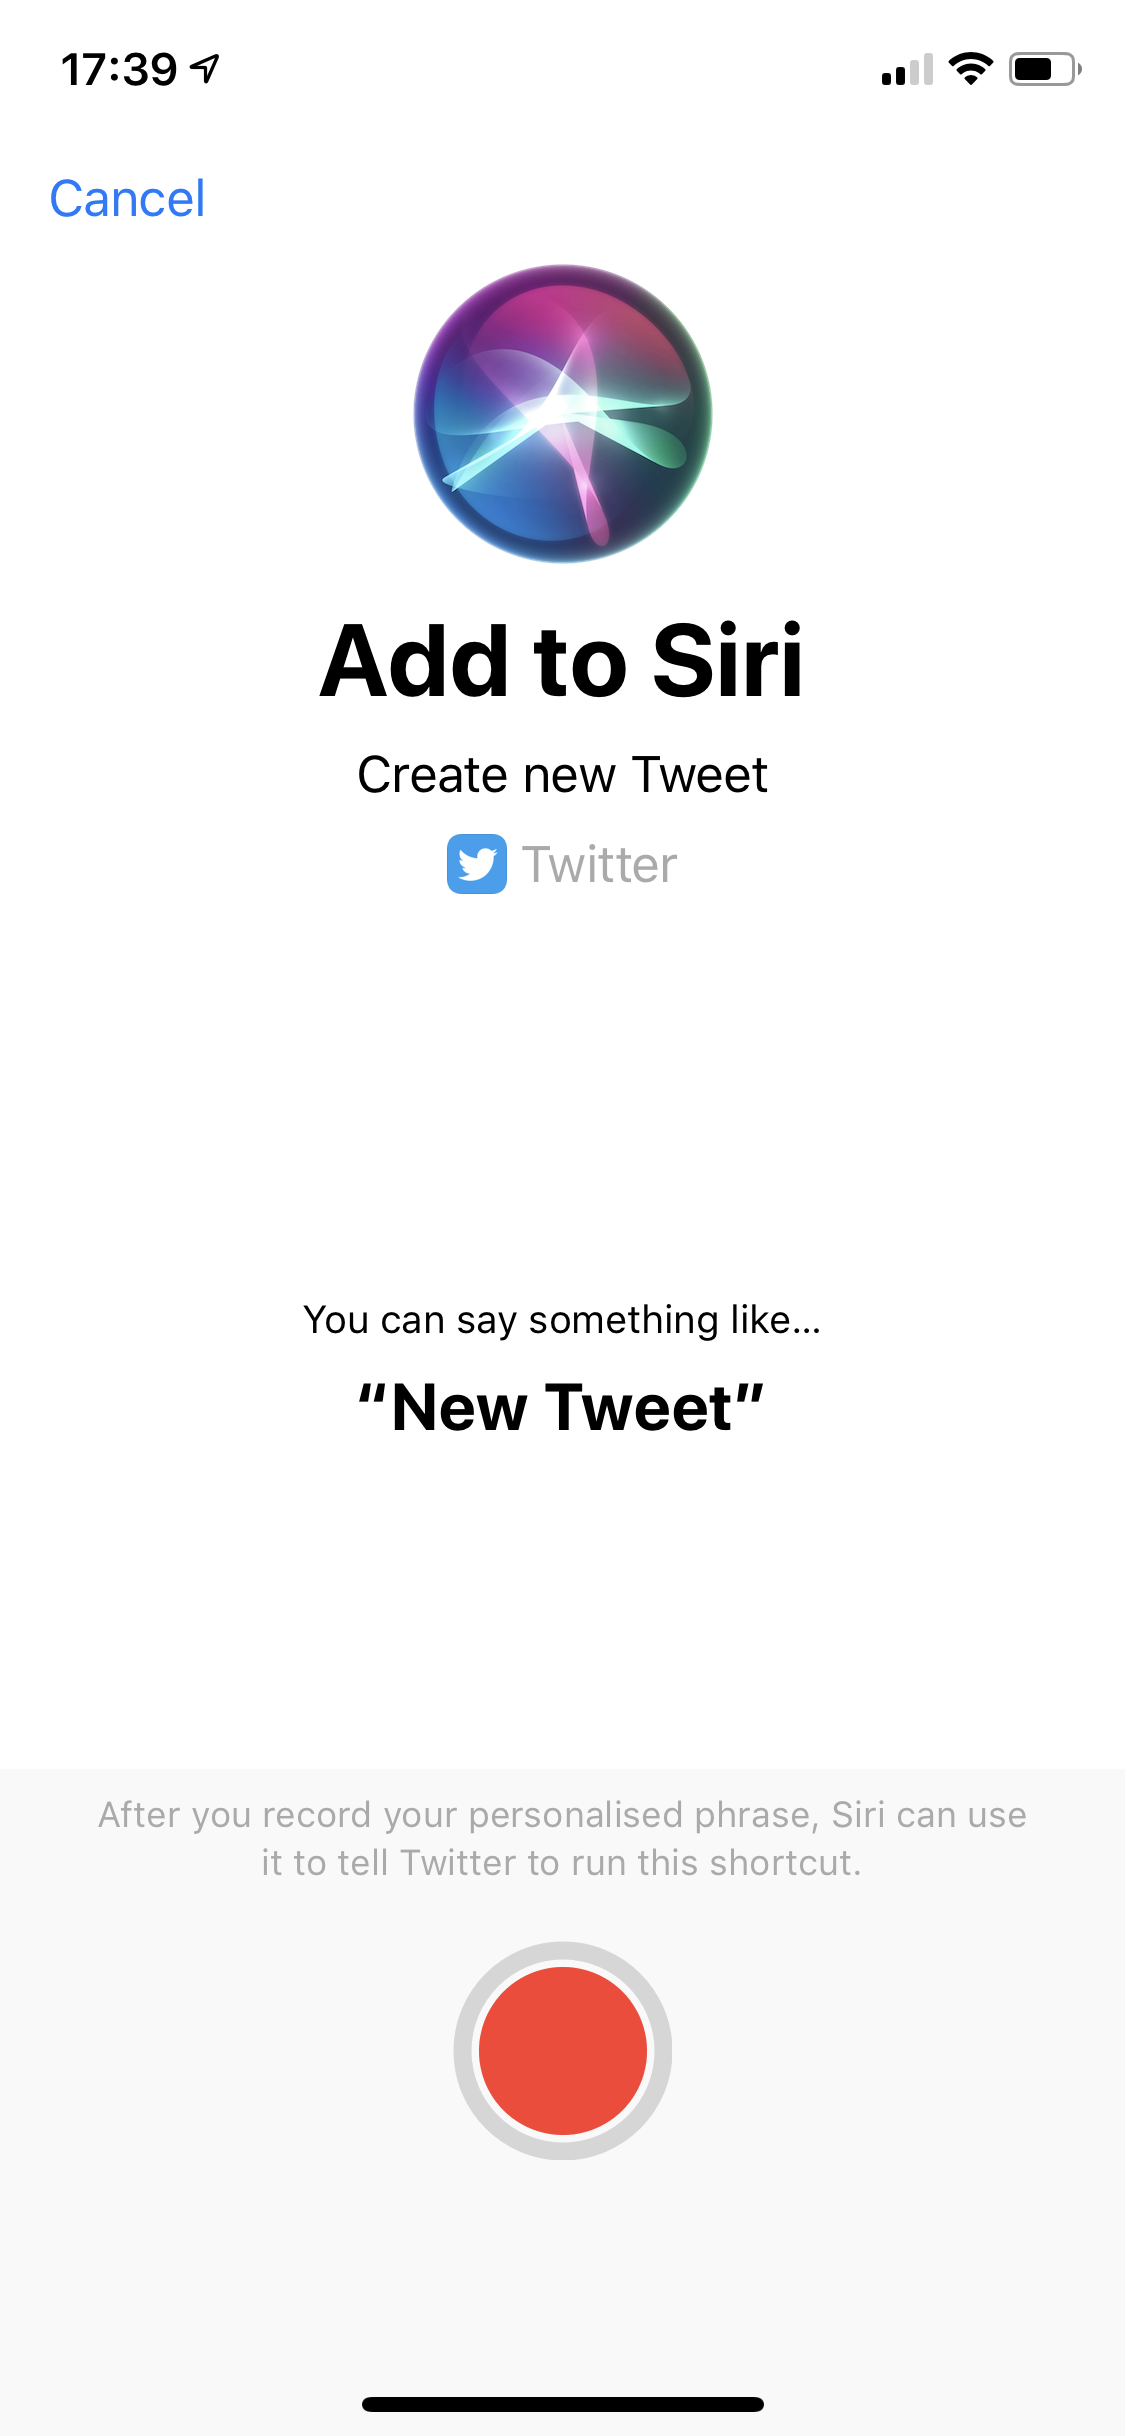
When app launches you can click on the button and Add to Siri Controller will pop up to allow you to record trigger phrase. Once it has done it and you click done, the Add to Siri button will change to Added to Siri. And your trigger phrase will be listed below. If you keep it short as Apple suggests you will be able to fully see it. This is very nice as user will always be reminded of what they setup.
Important - the Added to Siri button should persist even after application has been closed/killed. The Intent is associated with your app and this particular shortcut.
Bad Implementations
I found that some large apps haven’t done this correctly so far example British Airways app allows you to record the phase but doesn’t persist after application has been shut down. Even though I added a shortcut for “What is my next flight” it doesn’t display it.
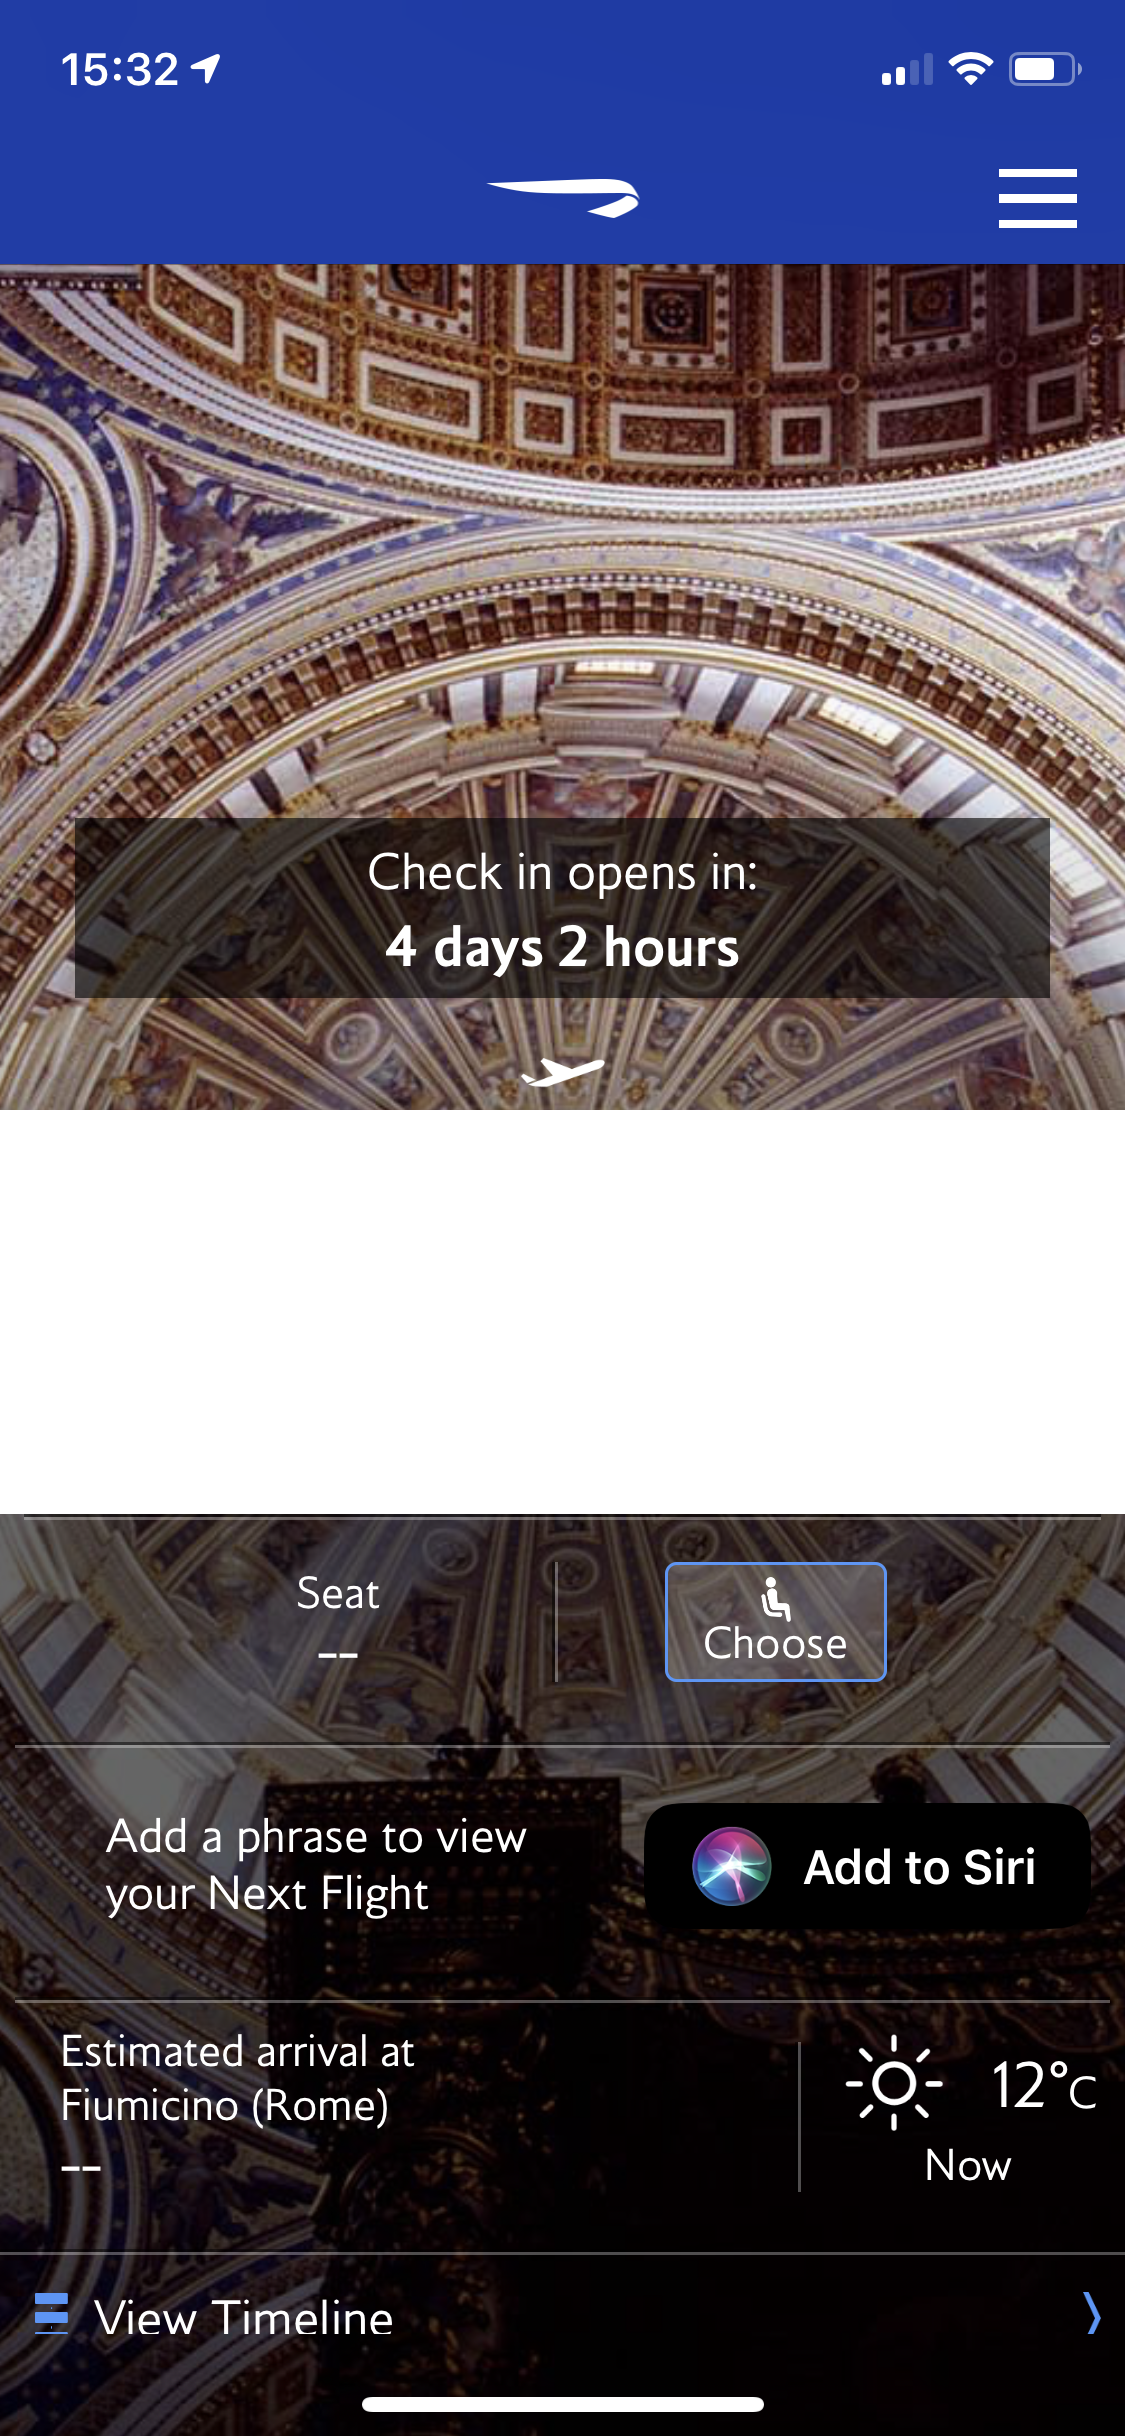
British Airways iOS app Broken Add to Siri Functionality.
In Conclusion
One other important aspect of setup is your app info.plist file should automatically add Intent as of part NSUserAcitivity. This happens when you create the intent. You shouldn’t need to add it manually like some tutorials on the web suggest you do, this might cause your Add to Siri button not function as intended.

Another important part of SiriKit is Intent Extensions. These create new targets for your app and allow user to interact with your app’s functionality without having to open it. I’m hoping to pen another post on this subject at a later date. This will cover Intent handling. I also feel that Localisation is highly important for Siri so this is something that would be great to cover later.
Hope you found this helpful. SiriKit provides a great way to add extra functionality to your existing app or create a whole new way to experience user interface. I’m exciting about building more with it.
Full project source code is available on GitHub.
This post is also available on Medium. https://medium.com/@Dan.Korkelia/sirikit-how-to-add-siri-shortcut-with-intent-to-your-app-9f64277bb8aa